
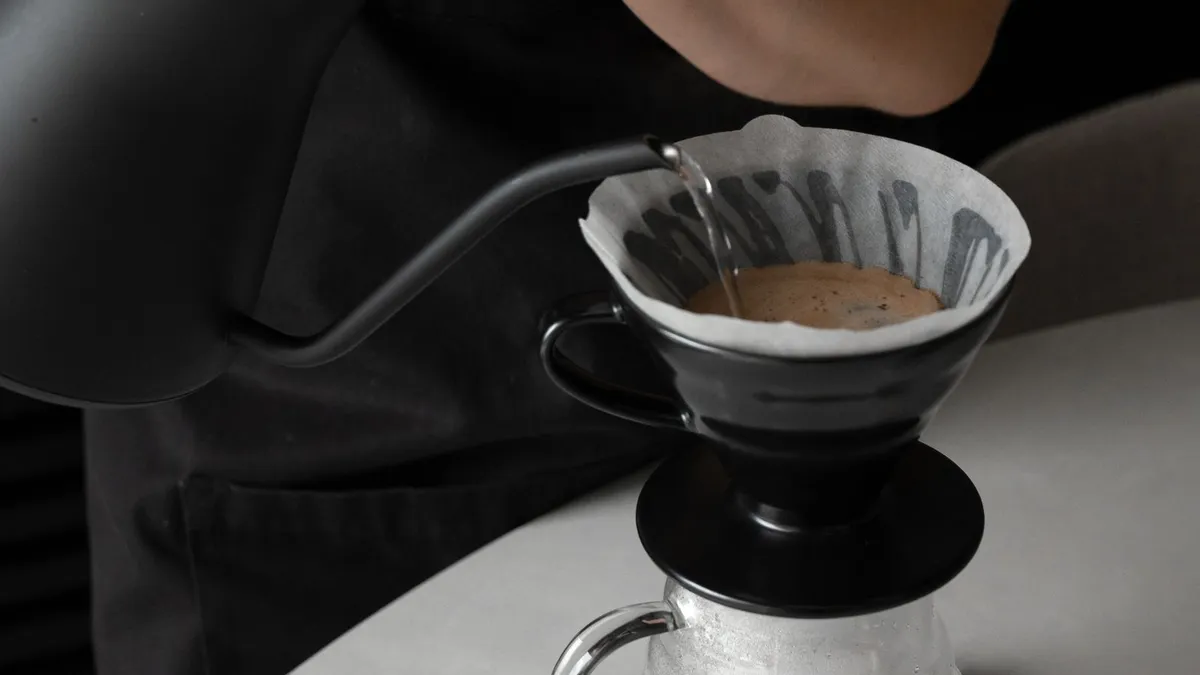
Good pour over isn't complicated. The trouble is that most advice stops at "use a medium-fine grind" or "water between 195-205°F" and never tells you what those numbers actually do, or what to change when the cup tastes off.
PourOverPro is reader-supported. As an Amazon Associate we earn from qualifying purchases. Product details come from each maker's specs and the Amazon listing; we don't lab-test products.
Start with 20 g of coffee to 320 g of water (about 1:16), a medium-fine grind like table salt, and water in the SCA's 195-205°F range or just off the boil. Rinse the filter, bloom for 30-45 seconds, pour slowly, and aim for roughly 2.5-3.5 minutes on a single-cup V60. If it tastes sour, try finer first. If it tastes bitter, try coarser. If it tastes balanced but weak, use a little more coffee. Change one variable at a time.
This guide covers the whole thing, start to finish: real starting numbers, what each one changes in the cup, and how to fix it when something tastes wrong.
Gear You Need
You don't need a fancy setup. You need gear that does its job.
A pour over dripper: Hario V60, Chemex, Kalita Wave and plenty of others all work. If you're not sure where to begin, the V60 02 is a simple, low-cost place to begin.

Hario V60 Plastic Dripper 02
- Lightweight plastic
- Size 02 brews 1-4 cups, per Hario
- Uses V60 02 cone filters
The Hario V60 Plastic 02 is light and hard to break, which is exactly what you want from something you'll be handling half-awake. It's a low-risk first dripper.
Filters: Buy the ones made for your dripper. For the V60 02, that means V60 02 cone filters. Paper is the norm. Metal filters let more oils and fines through, so you get a heavier cup.
Hario V60 02 Paper Filters, White (100 ct)
- Sized for the V60 02 dripper
- Oxygen-bleached white paper
- 100 filters per pack
A burr grinder: If you spend money anywhere, spend it here. A blade grinder chops beans into a mix of dust and chunks, and those extract unevenly. A burr grinder gives you a much more even grind. See our grinder guide for options.
A scale: Technically optional, but worth it. Weighing coffee and water beats scooping every time, and if the scale has a timer, you can track brew time without juggling your phone.
Hario V60 Drip Scale (new model)
- 0.1 g steps from 2-200 g, then 0.5 g and 1 g steps up to 2,000 g max, per Hario
- Built-in timer
- Auto-off after 5 minutes, but not while the timer runs
The Hario V60 Drip Scale reads in 0.1 g steps up to 200 g (enough for the coffee dose) and has a built-in timer, per Hario.
A gooseneck kettle: Also optional, also very handy. The narrow spout lets you pour slowly and put the water exactly where you want it. A regular kettle tends to gush. You can still make pour over with one; just pour carefully, in small pulses.
Hario V60 Buono Stovetop Kettle
- Stainless steel gooseneck, 1.2 L (best filled to about 800 mL)
- Works on induction, gas and electric stoves
- Designed and made in Japan, per the listing
The Hario V60 Buono is a stovetop gooseneck, so you'll need a thermometer or the rest-after-boiling trick below to judge temperature. If you want to set an exact temperature, an electric variable-temperature kettle such as the Fellow Stagg EKG Pro does that; see our gooseneck kettle guide.
A thermometer: Nice to have, not required. Without one, just boil the water and let it sit briefly before you pour (more on that in the temperature section).
Starter kit: A dripper, filters, a burr grinder and whatever kettle you already have.
Upgraded kit: Add a scale and a gooseneck kettle. That's everything you need for consistently good pour over at home.
Grind Size: Medium-Fine, Like Table Salt
"Medium-fine" doesn't mean much on its own, so picture this: for a single-cup V60, you want something close to table salt or fine sea salt. Small, even particles. Not powder, not chunks. Every grinder numbers its settings differently, so go by texture and brew time, not by a number someone posted online.
Why does it matter so much? Smaller pieces give up their flavor faster than big ones. And finer grounds also slow the water down, so it spends more time pulling flavor out. Grind does two jobs at once.
Too coarse, and the water rushes through before it's done its work. The cup usually comes out weak and sour.
Too fine, and the water crawls through and pulls out too much. Expect bitter and harsh.
Treat those as first guesses, not verdicts. Roast level, an uneven grind, water that channels through one spot, or a coffee that's simply bright by nature can produce the same tastes, so change one thing and see what the next cup tells you.
And grind right before you brew. Ground coffee loses its aroma fast, which is why pre-ground usually tastes a bit flat.
The Ratio: About 1 Part Coffee to 16 Parts Water
That's coffee to water, by weight. Think of it as home base: you'll adjust from here.
With a scale: 20 g of coffee and 320 g of water makes one generous mug. Double it for two (40 g coffee, 640 g water).
Without a scale: The old rule of thumb is about 2 tablespoons of ground coffee per 6 oz of water. It's a rough guide, not a precise one.
1:16 is where you start, not where you have to stay. The ratio mostly controls strength (how concentrated the cup is), not whether it tastes sour or bitter. Tastes balanced but a bit weak? Try 1:15 (more coffee). Too strong? Try 1:17. More detail in our coffee-to-water ratio guide.
Water Temperature: 195-205°F (90-96°C)
The Specialty Coffee Association cites 195-205°F (90-96°C) as the brewing range. Here's what happens on either side of it:
Well below the range: The water struggles to pull flavor out, and the coffee often tastes thin and sour.
Within the range: Hot enough for most coffees. Aim here first.
At a full boil: It can drag out harsh, bitter flavors, especially from darker roasts.
No thermometer? Boil the water and let it rest briefly before pouring (around 30 seconds is a common rule of thumb). That's a rough household shortcut, not a measured temperature: how fast water cools depends on your kettle, how full it is and your altitude. A thermometer or a variable-temperature kettle is the only way to know the number. Lighter roasts usually like the hotter end; darker roasts often taste better a little cooler. See our water temperature guide for more.
The Brewing Process
Step 1: Prepare the Dripper
Put a filter in the dripper, rinse it with hot water, and dump the rinse water. It takes seconds, cuts down on papery flavors, and warms up the dripper and cup while you're at it.
Step 2: Bloom (30-45 seconds)
Add your coffee and give the dripper a gentle shake to level the bed. Pour just enough water to wet all the grounds, about twice the coffee's weight (around 40 g of water for 20 g of coffee). Then wait 30-45 seconds.
That's the bloom. Fresh coffee is full of trapped CO2, and until it escapes, it pushes water away from the grounds. You'll see the bed puff up and bubble.
Step 3: Main Pour (about 2 minutes)
Pour the rest of the water slowly, in small circles, and stay off the very edge of the filter. Try to keep the water level fairly steady. With a gooseneck you can pour in one continuous stream; with a regular kettle, go in short pulses.
Step 4: Drawdown and Done
Let it drain. For a single-cup V60, roughly 2.5-3.5 minutes total is a common target. Way faster usually means the grind is too coarse. Way slower usually means it's too fine. The clock is telling you what to change.
Lift off the dripper, give the coffee a swirl, and drink it while it's hot.
Troubleshooting
Two different things can go wrong in a cup, and they need different fixes. Extraction is how much flavor the water pulled out of the grounds (too little tastes sour, too much tastes bitter). Strength is how concentrated the finished cup is (watery vs. heavy), and it's set mostly by your coffee-to-water ratio. The SCA Coffee Brewing Control Chart plots these as separate axes, which is why a cup can be strong and under-extracted, or weak and over-extracted. Keep the dose and water the same while you fix extraction, and only then adjust strength.
Coffee Tastes Sour or Sharp (Under-Extracted)
Likely cause: Under-extraction. The water ran through too fast or wasn't hot enough to pull out enough flavor.
Fix it (same dose, same water):
- Grind finer (slows the flow and increases extraction)
- Pour more slowly, or give the bed a gentle swirl after the last pour
- Use hotter water within the range
Adding more coffee isn't the fix here. It makes the cup stronger, but at the same water it can actually lower extraction, so the sourness can stay.
Coffee Tastes Weak or Watery but Not Sour
Likely cause: Strength, not extraction. The flavor is balanced, there just isn't enough of it in the cup.
Fix it: Use a little more coffee for the same water (1:15 instead of 1:16), and keep grind and temperature where they were.
Coffee Tastes Bitter or Harsh
Likely cause: Over-extraction. The water hung around too long and pulled out the harsh stuff too.
Fix it:
- Grind coarser (speeds up the flow)
- Pour a little faster
- Use slightly cooler water within the range
If it isn't bitter, just heavy or too intense, that's strength again: use a little less coffee (1:17 instead of 1:16).
Coffee Tastes Flat
Likely cause: Stale beans or pre-ground coffee. No technique fixes that.
Fix it: Buy whole beans with a roast date (not just a best-by date) on the bag, use them within a few weeks of roasting, and grind right before brewing.
Brew Time Is Way Off
Too fast: Grind finer.
Too slow: Grind coarser. And don't tamp or press the grounds. This isn't espresso; a gentle shake to level the bed is all it needs.
Quick Reference
| Variable | If Sour (under-extracted) | If Bitter (over-extracted) |
|---|---|---|
| Grind Size | Finer | Coarser |
| Water Temperature | Hotter | Cooler |
| Pour Speed | Slower | Faster |
| Brew Time | Longer | Shorter |
Coffee amount isn't in this table on purpose: it changes strength. Fix sour or bitter first with the dose held steady, then use more coffee if the cup is weak or less if it's too strong. These are first moves to try one at a time, not guaranteed diagnoses.
Start With Good Beans
Perfect technique won't rescue stale coffee. Buy whole beans, look for a roast date on the bag, and use them within a few weeks of roasting. A local roaster is great if you have one, but grocery-store whole beans with a recent roast date are fine too.
Quick Cheat Sheet
Gear: Dripper + matching filters + burr grinder + kettle (scale and gooseneck recommended)
Grind: Medium-fine, like table salt. Grind right before brewing.
Ratio: 20 g coffee to 320 g water (about 1:16)
Temperature: 195-205°F (90-96°C), or just off the boil
Process: Rinse filter, bloom 30-45 sec, pour slowly, let it drain
Target time: Roughly 2.5-3.5 minutes for a single-cup V60
These are starting numbers, not commandments. Change one thing at a time and let your own taste decide where you end up.
Next Steps
Once the basics feel easy, read about different dripper styles to see how they differ, and explore other brewing methods.
The good news: everything you pick up here (grind, ratio, temperature, timing) carries over to every other way of brewing coffee.
Sources
- Specialty Coffee Association: Coffee Brewing Control Chart (strength, extraction and brew ratio)
- Hario: V60 Plastic Coffee Dripper 02 (1-4 cup capacity)
- Hario: V60 Paper Filter for 02 Size Dripper
- Hario: V60 Drip Scale (capacity and reading steps)
- Hario: V60 "Buono" Drip Kettle 1.2L (800 mL practical capacity)