
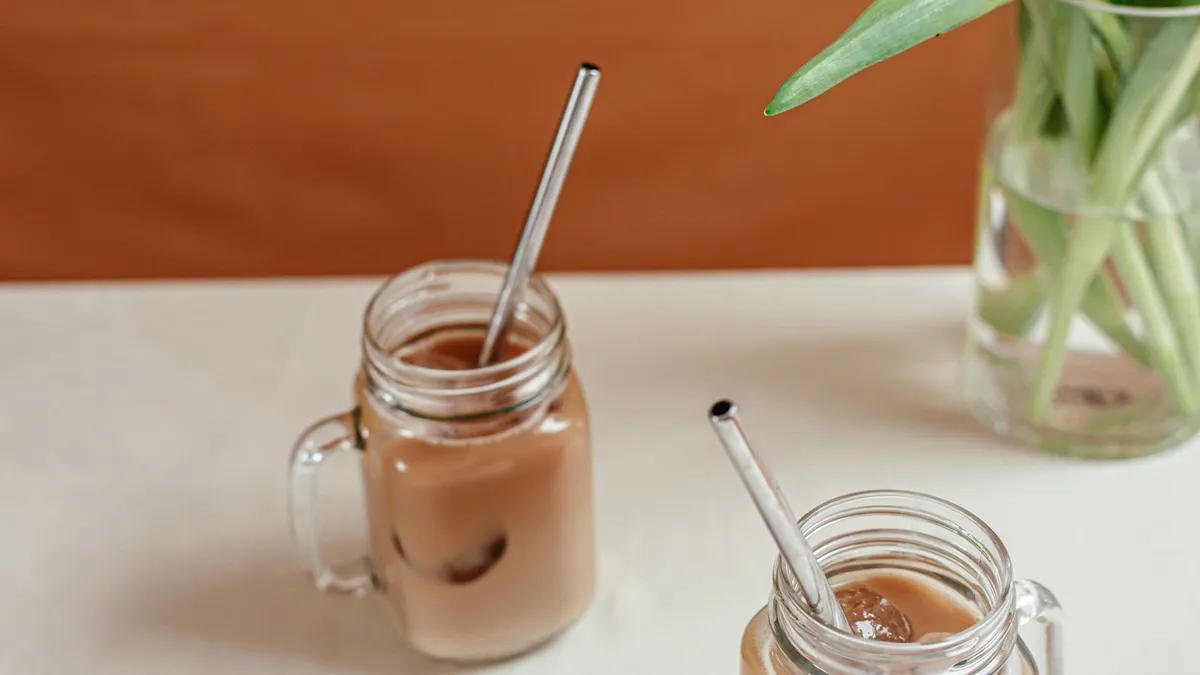
Cold brew might be the laziest good coffee there is. Coarse coffee, cold water, 12-24 hours of doing nothing, then strain. No technique to learn, no careful pouring, and one batch can cover several days of iced coffee.
PourOverPro is reader-supported. As an Amazon Associate we earn from qualifying purchases. Product details come from each maker's specs and the Amazon listing; we don't lab-test products.
Steep coarse coffee in cold water at about 1:8 by weight (for example, 100 g of coffee to 800 g of water) for 12-24 hours, with around 16-18 hours as a starting point, then strain. Dilute the concentrate about 1:1 with water or milk and adjust to taste. A mason jar works fine; the OXO or Takeya maker makes straining and storage easier.
The basic method comes first. After that, the stuff people usually end up wondering about: what concentrate actually is, how it differs from ready-to-drink, how long it keeps, which gear is worth it, and why cold brew isn't the same thing as iced coffee.
The Basic Method
You need:
- A jar or pitcher (a quart mason jar works well)
- Coarse ground coffee
- Cold water (filtered if your tap water tastes off)
- A fine mesh strainer, cheesecloth, or a paper filter
Step 1: Add Coffee
Add coarse ground coffee to the jar. For concentrate, about 1:8 coffee to water by weight is a common place to start. In a quart jar, that's roughly 100 g of coffee to 800 g of water.
Step 2: Add Water
Pour in the cold water and stir until every bit of coffee is wet. Dry clumps just sit there doing nothing.
Step 3: Wait
Cover it and walk away for 12-24 hours. Shorter steeps generally give you something lighter and brighter; longer ones, something stronger and heavier. Around 16-18 hours is a good middle ground for a first batch. Start it after dinner and it's ready by lunch the next day.
Fridge or counter both work for flavor. Warmer water pulls flavor out faster, so counter batches usually need less time than fridge batches. Pick one and stick with it, or you'll never know what changed. If you're unsure, the fridge is the cautious choice: cold brew is never heated, so nothing in the process kills bacteria (more on that below).
Step 4: Strain
Pour it through a fine mesh strainer or cheesecloth into a clean container. Want it cleaner? Strain it again through a paper filter. Toss (or compost) the grounds and put the coffee in the fridge.
That's it. You made cold brew. Mostly by waiting.
Concentrate vs Ready-to-Drink
There are two common ways to go, and the real difference is how much water you use.
Cold Brew Concentrate
Made at around 1:8 coffee to water. It's strong stuff, so you dilute it before drinking, typically about 1:1 with water or milk, or up to 1:2 if you like it lighter.
The appeal is flexibility. It takes up less fridge space, and you decide how strong each glass is.
Ready-to-Drink Cold Brew
Made with more water, often somewhere around 1:12 to 1:15, so it goes straight over ice. Great if you drink it black. The downside is a bigger jug in the fridge for the same number of drinks.
Which Should You Make?
Bounce between black coffee and milk drinks? Make concentrate. Want to grab, pour and go without measuring anything half-awake? Make ready-to-drink.
The Hot Bloom Variation
Some people cheat a little and start cold brew with a splash of hot water to bloom the grounds before the cold water goes in. Same idea as the bloom in pour over: hot water lets trapped CO2 out and gets extraction going. Fans say it gives a brighter, more aromatic result in a slightly shorter steep.
- Put your grounds in the jar
- Pour a small amount of hot water (around a fifth of your total water) and let it sit for a couple of minutes
- Add the rest of the water cold
- Stir well
- Cover and steep; you may find you can shorten the steep a little
- Strain
Try it next to your usual batch and see which one you reach for.
Mason Jar vs Cold Brew Maker
You don't need special equipment. What a dedicated maker really buys you is easier, less messy straining.
Mason Jar Method
A jar and a strainer or cheesecloth. That's the whole setup. The only annoying part is straining, which takes a few minutes and can get a bit messy.
OXO Good Grips Cold Brew Coffee Maker

OXO Good Grips Cold Brew Coffee Maker, 32 oz
- “Rainmaker” top; 12-24 hour steep, per OXO
- Brew-release switch drains the concentrate into a borosilicate glass carafe
- Reusable stainless mesh filter; makes concentrate for up to 14 drinks, per OXO
The OXO Good Grips Cold Brew Coffee Maker is built around fixing exactly that annoying part. After the steep, you flip a brew-release switch and the concentrate drains through the filter into a glass carafe. No juggling cheesecloth over a jar. OXO recommends a 12-24 hour steep and says one batch makes concentrate for up to 14 drinks.
Takeya Deluxe Cold Brew Maker
Takeya Deluxe Cold Brew Coffee Maker, 2 qt
- Tritan pitcher with a fine-mesh filter
- Airtight lid; fits most fridge doors
- Dishwasher safe
The Takeya Deluxe Cold Brew Maker is a pitcher with a fine-mesh filter insert. You brew and store in the same pitcher, which the listing says fits most fridge doors. If you want brew-and-pour with nothing to think about, this is it.
How to Choose
Not sure you'll keep making it? Start with a jar. Making it every week? A dedicated maker earns its spot. Get the OXO for the easiest straining and a glass carafe, or the Takeya for a pitcher that just lives in the fridge door.
Cold Brew vs Iced Coffee
People use the names interchangeably. They're not the same drink.
Iced coffee is hot-brewed coffee that's cooled or poured over ice.
Cold brew is brewed with cold or room-temperature water and never heated.
Cold water extracts differently and more slowly, so cold brew is typically described as smoother, sweeter and lower in perceived acidity. Iced coffee tastes more like regular hot coffee, just cold. Iced coffee is quick. Cold brew takes planning.
How Long Does Cold Brew Keep?
Two separate questions here: how long it stays safe, and how long it stays tasty. Don't use one to answer the other.
Safety. Research from the University of Georgia's Center for Food Safety found that pathogens such as Salmonella, E. coli and Listeria didn't grow in cold brew, but they did survive in it: roughly 9 to 12 days in that work, and over 30 days for Bacillus cereus. Because cold brew is low in acid and never heated, the researchers point to the brewing step as where contamination happens. Their advice: wash your hands and all your equipment before brewing, and store cold brew in the refrigerator. Keep your fridge at 40°F (4°C) or below, per FoodSafety.gov.
There's no official, tested shelf life for homemade cold brew that we could find, so we won't give you a number. A clean jar, clean hands, a covered container in the fridge and drinking it within a limited time is the practical approach. Smelling or tasting it is not a safety test: bacteria that can make you sick don't necessarily change how coffee smells or tastes.
Milk and other add-ins. Once you've mixed in milk, cream or anything else perishable, treat it like that ingredient, not like black coffee: keep it cold and don't leave it sitting out. The USDA's general rule for perishable foods is no more than 2 hours at room temperature, or 1 hour when it's 90°F or hotter. Store the black concentrate on its own and mix drinks as you pour them.
Flavor. The taste fades as it sits, and many people find concentrate holds its flavor better than diluted batches. Write the brew date on the container, because you will forget.
Serving: Water, Milk or Cream
If you made concentrate, dilute it however you like:
Water: Straight-up cold brew, clean coffee flavor.
Milk or plant milk: Smooth and creamy, a lot like an iced latte.
Cream: Rich and heavy.
Syrups: Vanilla, caramel or simple syrup if you like it sweet.
A Simple Cold Brew Recipe
Use this as a starting point:
- Get a quart mason jar
- Weigh out 100 g of coarse ground coffee
- Add it to the jar
- Add 800 g (800 ml) of cold filtered water
- Stir well so all the grounds are wet
- Cover and refrigerate
- Steep about 18 hours
- Strain through a fine mesh strainer or cheesecloth into a clean bottle
- Refrigerate
- To serve, mix concentrate with an equal amount of water or milk and pour over ice
Hands-on time: a few minutes. The rest is waiting.
What to remember
Coarse coffee, cold water, about 1:8 for concentrate (or roughly 1:12 to 1:15 to drink straight), 12-24 hours of steeping, then strain. Dilute concentrate about 1:1 to serve. A jar is fine. The OXO or Takeya just makes straining and storage easier.
Troubleshooting
Cold Brew Tastes Weak
Try more coffee, a slightly finer grind, or a longer steep. Just not all three at once.
Cold Brew Tastes Bitter or Harsh
Shorten the steep, grind coarser, or move the jar from the counter to the fridge.
Cold Brew Has Sediment
Run it through a paper filter a second time, or use a maker with a fine filter.
Make Your First Batch of Cold Brew This Weekend
A few minutes of work and a bit of patience. Make a batch, tweak the ratio and steep time until it tastes right to you, and future you gets iced coffee waiting in the fridge for days.